Yes, an automated response is doable on Facebook Messenger; this is a great technique that more marketers should know! It will be of exceptional help if your marketing strategy places a premium on interaction via Facebook.
There are two ways to set up Auto Response messages for Facebook Messenger: through the Facebook Page Inbox and using different tools. In this article, we will cover how to Set Up an Auto Reply on Facebook Messenger using Facebook Page Inbox.
The former is designed for smaller businesses that exclusively use Messenger, and the latter is best suited for larger organizations that also make messaging-related use of other Meta products like WhatsApp and Instagram.
What is an Auto Response?
The first reaction to any new messages received on your Page can be an automated message. They buy you some breathing room to formulate an ideal response to the user at a moment that’s convenient for you. In the interim, you can reassure the sender that their communication has been received and is being handled by leaving a reply. Always keep auto answers brief, as they are not intended to be a permanent response to the user.
How to set up an auto response on Facebook Messenger?
You need administrative, editing, or moderator privileges on a Page to generate automated responses for Facebook Messenger. To get started, head on over to your own Facebook page.
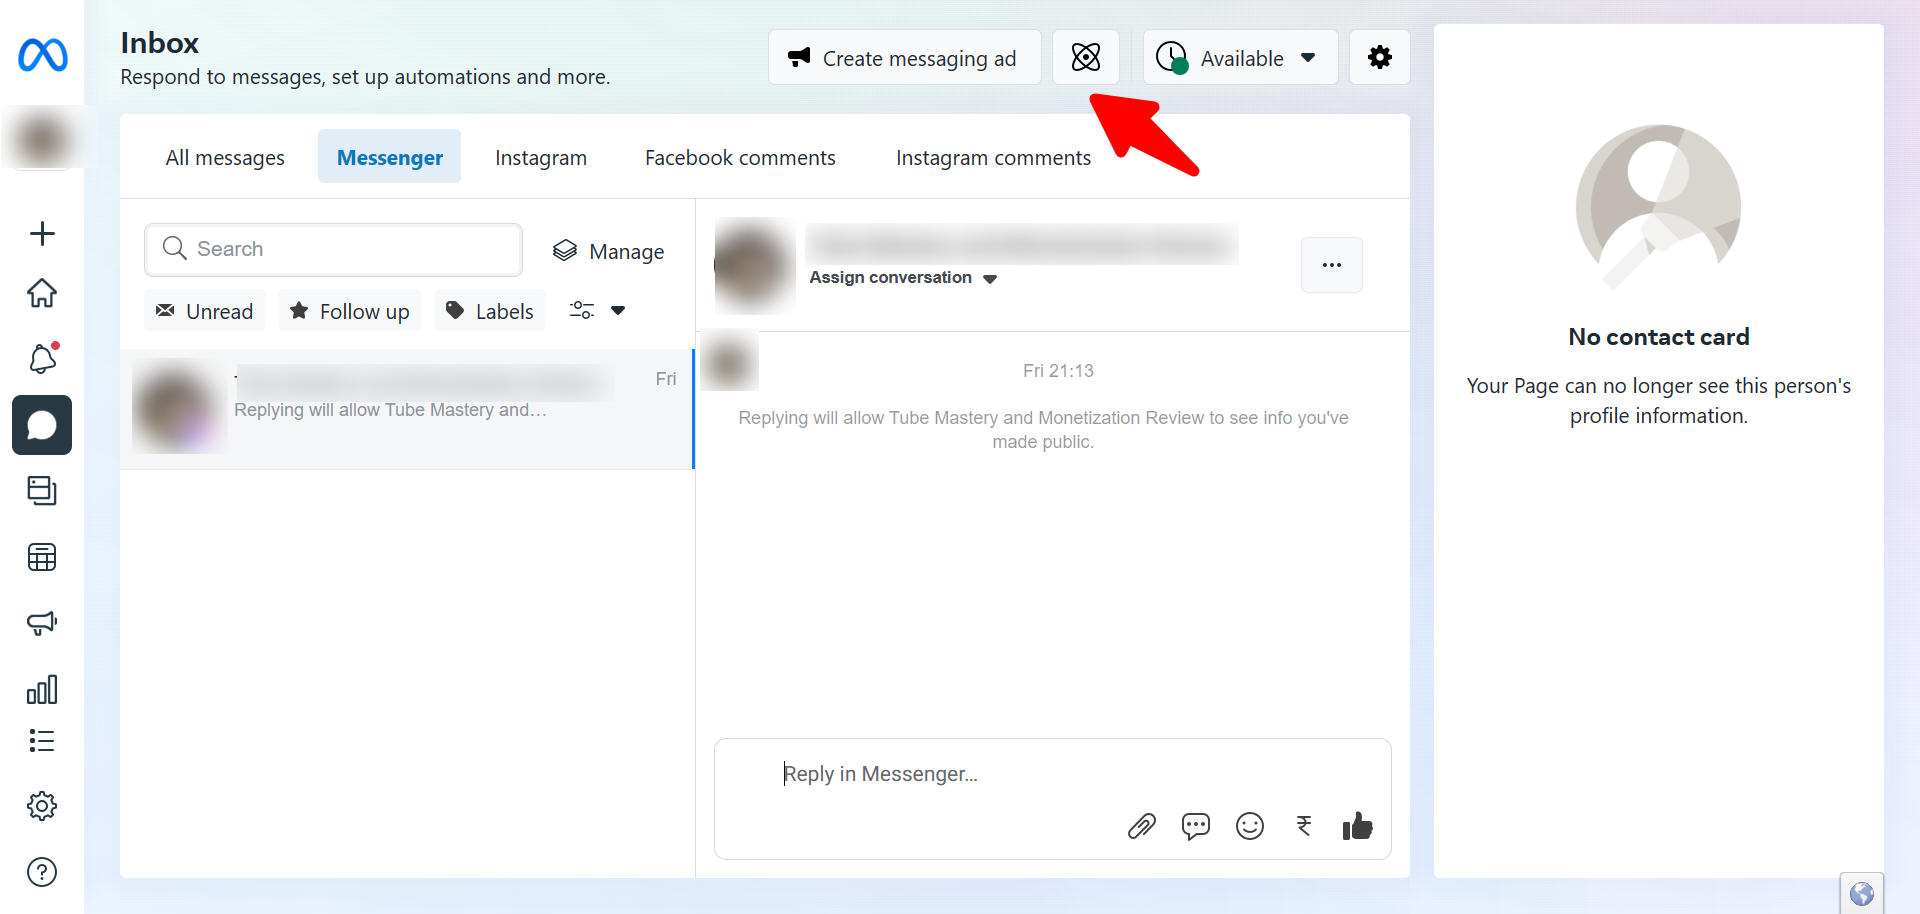
1. Navigate to the inbox.

2. Navigate to the Automations tab.

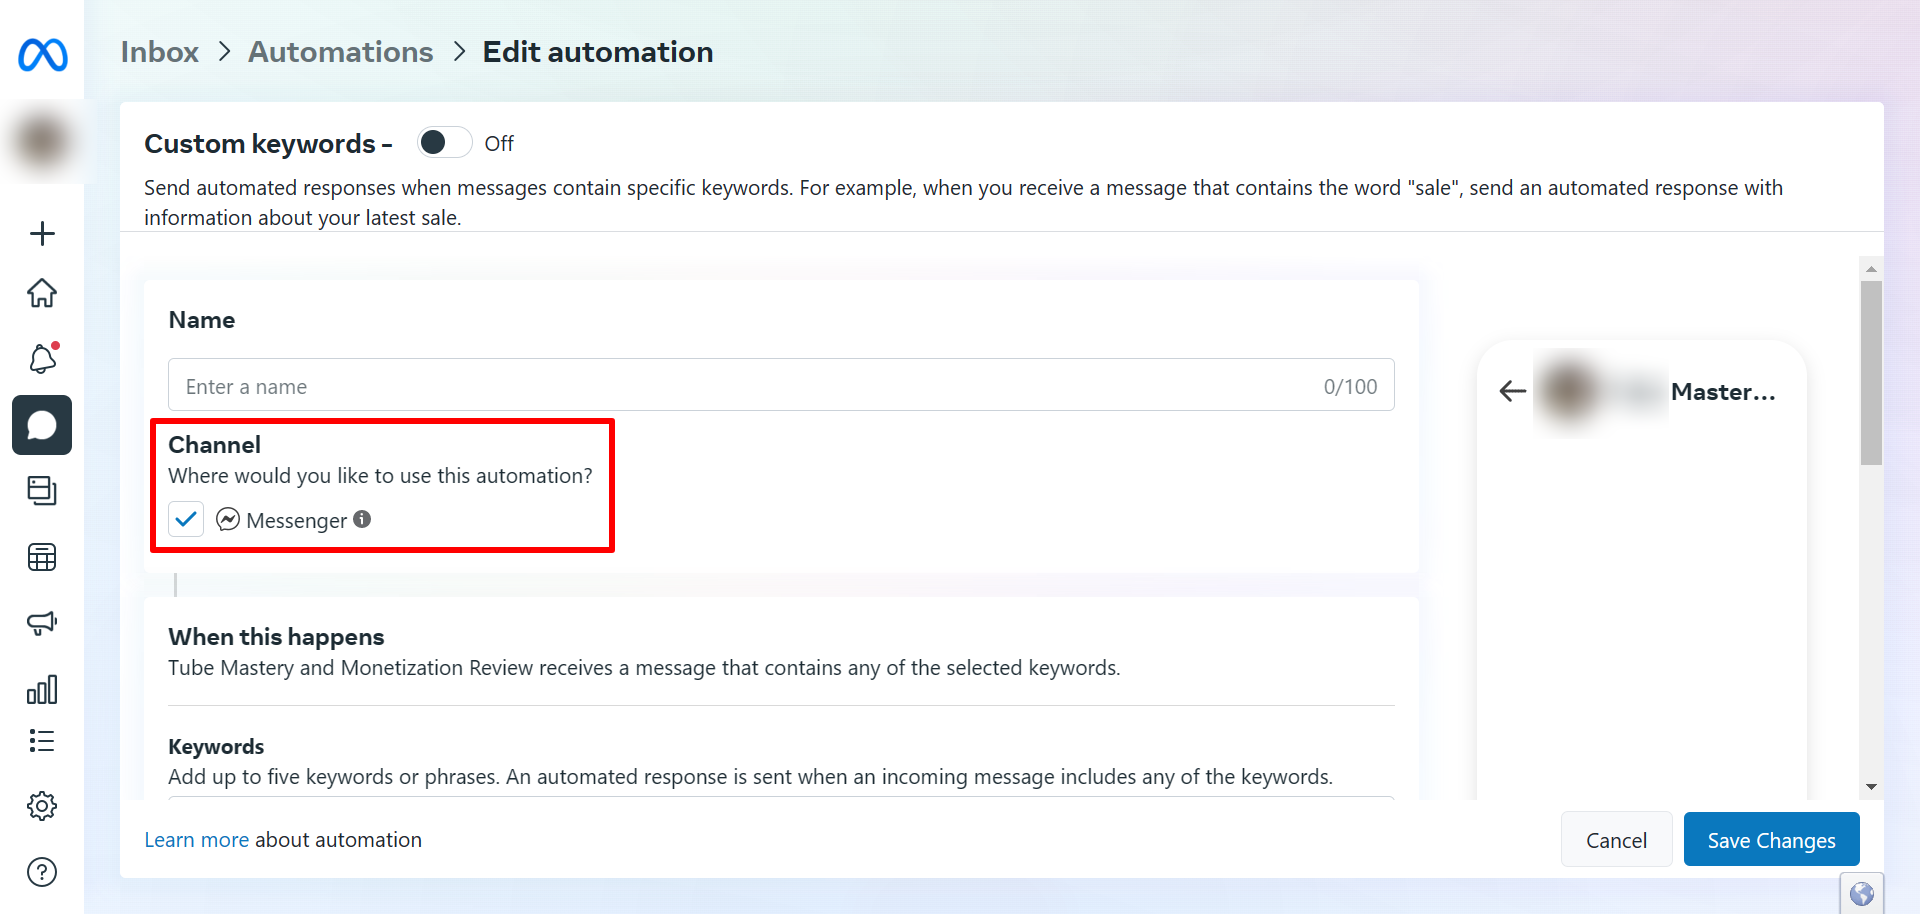
3. Go to Instant Reply and activate the option to make it visible.

4. By clicking the option, indicate that you want to use Messenger as your primary platform.

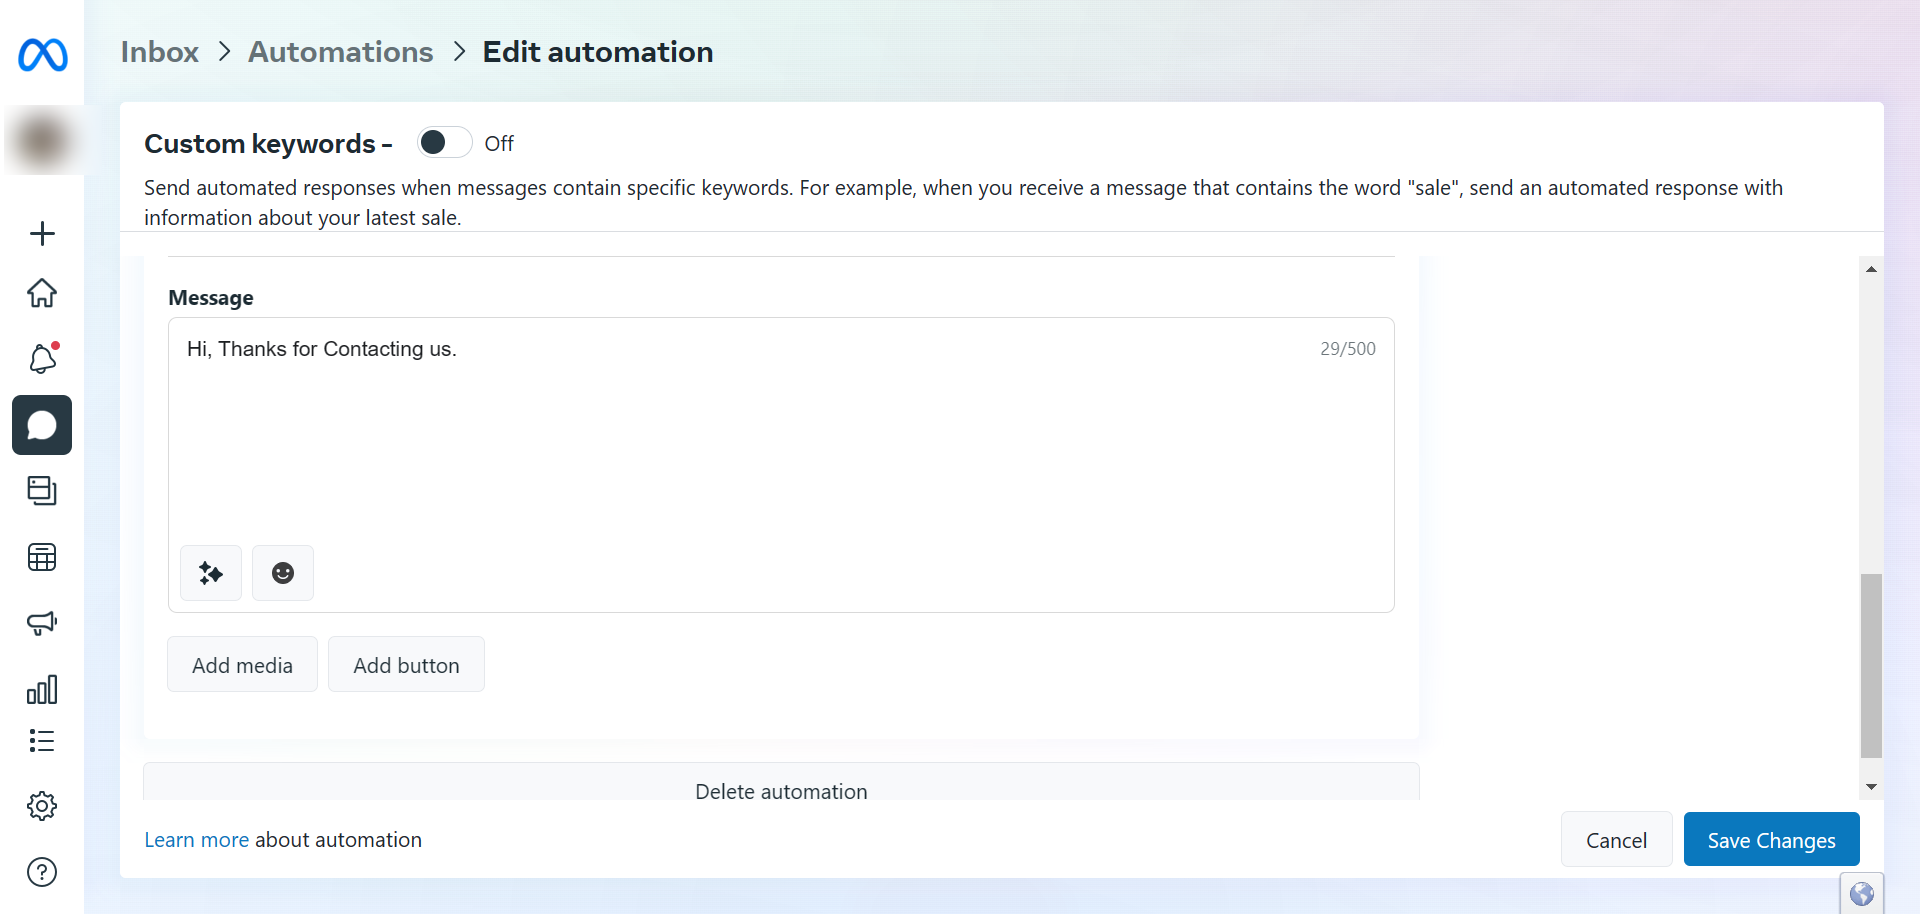
5. Write down the message appearing as your auto-reply on Facebook Messenger

In this section, you can customize the auto-reply by adding the recipient’s name.
Sending the message to your mobile device is another option for testing the auto-reply feature of Facebook Messenger.
To complete the process, select the Facebook Messenger auto-reply message and then the Save Changes button.
The benefits of using Facebook Messenger’s auto-response feature
Facebook Messenger auto-responses help businesses and people. Using this feature may have many benefits:
24/7 availability: Auto-responses ensure timely responses even when you’re offline. This is especially important when dealing with organisations or people across time zones or who aren’t available during business hours. It promotes responsiveness and professionalism.
Improved Customer Satisfaction: An auto-response informs users that their message was received and will be processed soon. They can be sure their communication was received and have a better experience.
Capturing Leads: Auto-responses can help firms gather leads and information. Providing links to appropriate forms, surveys, or FAQs might assist in answering their queries and keep them involved.
Time Savings: You can automate the initial greeting or response instead of responding to each message. Thus, you can focus on more complex problems or other tasks.
Personalization: Personalizing your auto-response reflects your brand’s tone and style. Well-written messages—friendly, professional, or humorous—can leave a lasting impression.
Boost Engagement: Auto-response features make clients feel heard, increasing the likelihood that they will do business with a company. Follow-up questions are only one way to use auto-response prompts to get people talking.
Controlling High-Volume Expectations: An auto-response can help you and your staff handle the predicted high amount of questions during a launch or campaign.
Reduce Stress: People appreciate that their message survived the internet. A simple confirmation of receipt might ease the frustration of those waiting for a reply.
Professionalism: Your page can look professional with an auto-response. It shows you value your readers and are trying to engage them properly.
Facebook Messenger auto-responses can improve audience engagement and make them feel valued.

